Wednesday, October 14, 2015

I am 1 in 4


October 15th commemorates a common thread of grief that runs through the veins of struggling mothers and fathers to be. They lost a child, or two, or three. Maybe  more. Period.

Men and women are coping with such a profound loss, putting the heartache into words is hardly possible. Many families grieve in silence and never come to terms with their loss. 

Today I ask that you think of those people by understanding they haven’t quite reached that chapter in life that some of you so fortunately have. Be mindful of those who are silently suffering or who have suffered a tremendous loss. Light a candle for the ones they lost and be thankful for the ones you have.  

I am 1 in 4.

Tuesday, February 17, 2015

I’ve said to myself at least 11 different times… THIS could be the one

Being stuck inside a body that inexplicably doesn’t function on the most basic human level is a pain that never subsides for those who are trying to have children. You can’t help but wonder what, if any purpose you have on this earth. Being inadequate has never felt so awful. And being reminded over and over again from failure after failure is a heavy burden to bear, especially when it's your fault.

I read once that research found women experiencing infertility have emotional stress levels similar to Cancer patients. Failed fertility cycles are painful to accept and often result in depression or isolation, or divorce, and eventually feed into other psycho-social disorders. Simply stated, my physical inability to have a child has consequences on a social and emotional level and it’s a struggle every day for me, personally. Mostly because I'm innocently reminded every day that this is my reality. Sadly, this has been my life for the last 7 years. 

Physically you are spent from all the drugs being pumped into your system. Your arms, your ass, your stomach – are all black and blue from daily injections. Your body is completely out of sorts with weight gain. Your mood is off the charts and unpredictable. You have people looking inside of you every few days running methodical test after test. Emotionally you are a train wreck waiting on the afternoon call with the next steps or dosage changes which means you may need more costly meds overnighted to your house (which you have to be there to receive). Your marriage… it gets tense. And if you’re me, the staff will actually know you on a first name basis. 

Infertility is even more difficult to accept when there is no reason to explain it. If you knew why things weren't working you could at least surrender knowing there is nothing more you can do - and then you can move on. But if it’s unexplained infertility you are constantly chasing that statistical carrot on the stick. “This could be the one” your doctor might say, followed by a very sterile non-biased hard-to-read explanation and a little womb doodle. I’ve said to myself at least 11 different times “THIS could be the one”. I’ve received a total of 11 different treatments over the course of 7 years and we got one beautiful baby girl named Stella.

"At least you’ve got one" people say. True, we did get Stella but and it wasn’t easy. 2 clomid cycles, 4 intrauterine inseminations, 3 IVF attempts and one miscarriage later (about 5 years of treatment) is what it took for me to get pregnant with Stella. Now that She’s almost 2 years old I can’t help but think about having another – like most people get to do if they so choose. 

And so it goes... this past summer we had our transferred our single frozen embryo that we saved for 2 years and it worked! But just two weeks after the best news we could have received I was told we should prepare ourselves to lose the baby because it wasn’t developing at the proper rate. I had to go back to the doctor every week and literally watch our baby slowly die on the ultrasound until it finally gave up 9 weeks and 6 days later. I ended up getting a D and C at the same clinic I went to get pregnant. He was a boy. 

A couple months later we worked up the courage to go in full force. This time we did IVF with genetic testing to make sure the embryos were healthy before they were transferred.  This was the longest cycle ever (about 6 months total) before we could compete the transfer. We literally paid to have our embryos flown to California in first class to have them tested and flown back to us. After it was all said and done we only had 2 embryos to work with but we were stoked. All it takes is one!

On the day of the transfer we were told one embryo didn’t thaw properly. Our odds went down considerably that day from 60% to 30%. As usual Jeff did his best to help me stay positive. Poor Jeff. Once again I laid in bed for two days not moving a single muscle. Most people thought I was celebrating my 40th birthday. Little did they know I was on bed rest and maniacally referencing notes I had compiled from previous cycles to make sure everything was in line with a good turnout, and it was... Except here I sit having just received news that yet another cycle has failed. “Sorry to tell you, it didn’t work this time” And there went another $18,000.00 of our nest egg... just.like.that.poof.
Since most people don’t struggle with infertility I understand why it's hard to know what to say to someone like me. I’m bitter towards friends and family who reap the benefits, I turn my head at pregnant women, and I literally envision injuring anybody who dares to ask about "the status of number two".  I’m not exaggerating when I say it takes a lot to stop myself from physically reaching out and hurting someone who approaches me about this. And every time I'm put in this situation I duck into a room or hide in my car bawling my face off. So I've found it's much easier on me to keep my distance from everyone who has what I ever wanted, and who always manages to say the wrong insensitive thing when they bring up the topic. It’s just too painful to deal with over and over again.


I never pictured raising an only child because I didn't have a choice. I’m burdened by an unbelievable amount of guilt for leaving my daughter without a sibling due to my own personal deficiencies, and giving my husband less than what we planned for while also throwing tens of thousands of our dollars out the door trying to make it work. And now I struggle with making the decision to stop seeking treatment even though THIS was supposed to be the last time - again. I don’t know if I can move past this. I feel I’ve reached an emotional and financial edge but my sense of self-efficacy tells me I haven’t really done everything in my power if I can still afford the treatment, even if that means completely emptying our savings.  I know that sounds ridiculous…. (to you). But how do you walk away from something you've literally invested 8 years of your life trying to accomplish?  I almost feel it’s less painful to continue with fertility treatment and fail rather than walk away from our dreams because the latter is the hardest hit to take of all. 


Saturday, October 11, 2014

Window Monsters DIY

Halloween is a great time of the year. Not only do you get to dress yourself (and innocent family members) in ridiculous costumes, but you also have the opportunity to kick-off the ruthless onslaught of seasonal decor with creations on your own terms.  Once Thanksgiving shows up it's all about turkeys and those weird cones with fruit falling all over the place. yawn.

Anyway, you probably noticed I haven't published a single blog since December of last year. Well, I'm tired. I can't use the excuse that "I'm busy" because I've always been busy and never had a problem squeezing in some great projects ... before.  That was until I had a kid. Once you have a baby it's all over. I can't believe I'm even admitting that but it's true. Oh how the mighty have fallen.

Moving on - Halloween. Yes. Costumes. Yes! Window Monsters YESS!!! Halloween on a Friday Night? HELL YES!!!!!

Sadly, I can't take credit for these window monsters. I wish I could because they are really easy to do. I needed some inspiration and of course Pinterest sucked me in. I figured this would be super easy and quick and I was right! Thank God because sometimes Pinterest really lets you down.

There weren't any directions on how to do this. I had to figure it out but it wasn't hard. Here's what you need:
  • Cardboard or matboard sheets large enough to fit your window openings
  • Box cutters/scissors
  • A bionic hand to cut the cardboard
  • A marker
  • Black paint/brushes
  • Contact paper or tissue paper
If you don't have any cardboard go to a frame store and ask them for their mat board inserts. They will have a TON of huge cardboard inserts that get shipped with their supplies. I was so excited when I figured that out. Yay me. 

1. I started by laying out each sheet and measuring the height of my monsters. You want some variety and height for each panel. Cut each panel so they are really snug in the window frame. That way you won't need to use tape.

2. Draw your monsters with a marker or something dark enough to see on cardboard. Don't worry about the lines because you're going to paint over them. 

3. Cut each monster shape out. This was hard and took some time. Cutting cardboard with scissors takes an intense amount of strength and patience. I didn't do well with either but a glass of wine really helped.


4. Paint the cardboard black. I tried using spray paint first but it was so porous it just sucked the color right through (see my pic?). Lame. I decided to use oil paint which I already had on-hand. Plus, I wasn't driving my butt back to the store. I would suggest using cheap acrylic or tempera paint for this. It will dry a lot faster than oil based paint and has great coverage.


5. After you paint the monsters you'll want to cover their eyes with a translucent material. You want something that will let the light shine though from behind. I used contact paper and taped it to the back. You could also use tissue paper. 

6. Pop those babies in the window and enjoy!


Sunday, December 22, 2013

Holiday Snow Globe Soaps!


If I can make a bazillion of one cute thing for all my favorite people in an afternoon, I win. Especially during the holiday season. You think you have time, then you don't. How does that even happen?  It takes all year for December to come around. We know this. Then a week before Christmas everyone is rushing around taking care of last minute details…. Guilty as charged. Well this year a friend and I decided to try something different. And it worked!

Nothing says Happy Holidays more than a thoughtful hand-crafted stocking stuffer.
Here's what you need;


  • 2 ice cube trays
  • White soap
  • Teeny tiny Christmas decorations (1/2 inch tall)
  • Soap scent
  • Soap dye (blue)
  • Soap glitter (optional)
  • Clear Glycerin
  • About 2 hours to complete this project
Steps:

1. First you want to grate your white soap. This will be used as the bottom of the snow globe. Think "Snowflakes". Make them thick curls and not powdery (trust me on this).


 2. Then you're going to melt your glycerin in the microwave. Stir it around every 20 seconds in a microwave safe dish. I used a Pyrex container for this. Add a couple drops of the dye after the soap is melted. You can get darker but you can't go lighter, so just stick with a drop or two. You want it to be light so you can see the little toy inside. (Optional, at this point you can also put in the glitter soap).


3. Carefully pour the melted glycerin into the ice cube trays. Only fill them up about halfway or a little less. Remember, you have to stick a figurine in there, and then you need to cap it with snow. Let it sit for about a minute. The glycerin will begin to form a skin on the top layer. This is your window of opportunity!


4. Using a toothpick, carefully position your figurine in the center (UPSIDE DOWN) in the ice cube tray. Like this...


 5. Then you're going to sprinkle a little bit of the white snow on the top of your ice cubes. Seal the snow up with the remaining amount of melted glycerin. You can also melt some new glycerin and leave the dye out so it's clear. This is what we did and it looked great. 

6. Put them in the freezer for about 15 minutes. When the cubes have cooled, crack them slowly just like an ice cube and out will pop your perfect little snow globe. 


 7. We decided to get tags printed and wrapped everything up in a very festive package. This is the end-product! Not only did everyone love this, but it was very easy to clean up in the kitchen.


 Happy Holidays!
This was a Danchelle Production. 


Saturday, November 16, 2013

Feeling Fall'ish

So I realize now, it's been about 4 months since I've updated my blog. (Gasp) Well I've been busy. Raising a child and stuff. But I wanted to get back on it so here I am. Now back to your regularly scheduled recordings…

Now that I have a baby, I get to do all these silly things I never EVER in a bazillion years would have ever considered doing. But now I'm doing even worse things than I ever could have imagined and I blame Pinterest. Browsing Pinterest can be deadly. It puts terrible ideas in your head about things you can do, and things that you really like but would probably never do, and things you shouldn't do but try anyway. It's exhausting.

So, I was looking through Pinterest one night when I wasn't sleeping (again) and found these pictures of babies with their butts painted like a pumpkin. It was cute.. so cute. The photos were perfectly staged and the little pumpkin butts were just .. well, you know. So that night in July, I decided to take another Pinterest adventure and do this with Stella. 

I don't know why I thought face paint would be ideal for the task. Obviously they don't sell butt paint (do they?). Anyway, I decided to wait until Halloween and goto the store like everyone else and purchase face paint. 

Well come to find out, face paint really sucks these days. I'm honestly not sure it was ever great. But nowadays it really sucks compared to whatever we used back in the day. I'm pretty sure whatever I bought was made in China out of some nuclear byproduct. You know when you buy something in the store and when you get it home it looks NOTHING like what you saw in the store? That's what happened to me. It "LOOKED" like pumpkin orange in the store, but when I got home it was like the color of volcano lava from a Nat Geo special. It was really scary looking.

Anyway, I put it on my baby. Let's talk about that…. So I got everything ready. The paint, towels, the pumpkin (props), and the camera close by. Stella was lying on the floor minding her own beeswax and here I come with fluorescent biohazard paint and schmear it all over her little behind. I even drew a little stalk on the top. cute.  

Clearly I hadn't done this before because the pumpkin really didn't capture the bottom portion of her bum quite how I envisioned (i.e; it wasn't Pinterest perfect). But going back to make the correction was a gamble. Seven month olds have the ability to spin around like the Tasmanian devil. Sometimes it takes two of us to get her in pants. (Don't even get me started about putting her in tights). Anyway, what I failed to think about was the white carpet directly underneath my spinning tornado butt. So this is where I accepted her butt for what it is, and this is what we got.


Not exactly the Pinterest Perfect look I was striving for but at least I can check this off the list and confirm yes - it's total pain in the ass … ha ha. I made a funny.  

Monday, June 24, 2013

Upcycled Drama!

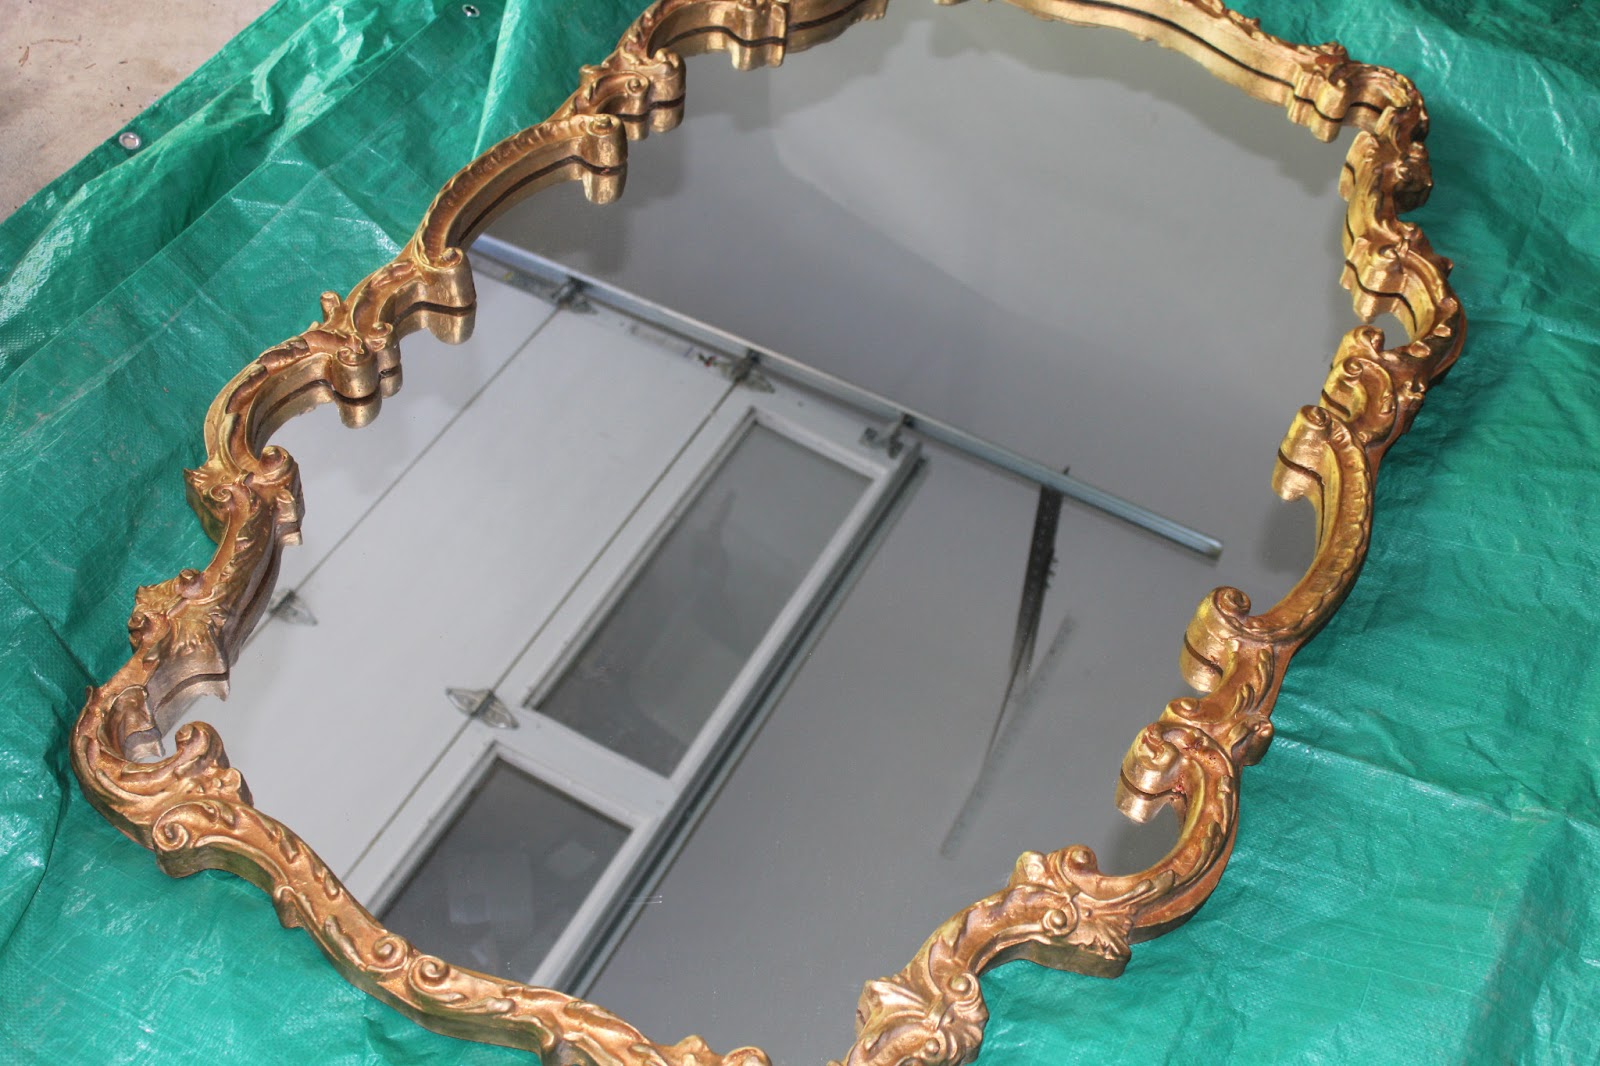
In the process of redecorating our master bedroom, I decided to replace a mirror that matched our dresser with something a little more swankier. The problem was, the mirror I was looking for was way too expensive ... So I decided to DIY it!

As usual, my first stop was Craigslist. You can search almost any word and find some interesting "things". In my case I just searched for mirrors - and found the PERFECT piece!
This mirror was about 60" long and weighs in at around 50lbs. But clearly that didn't stop me since Jeff did all the heavy lifting (thanks honey!).


Instead of using tape around the curves I was able to slip some paper around the frame to protect the mirror when I painted it. And this time, I used good old fashioned spray paint. 


The final result was pretty dramatic and definitely added some swank to the room! Now to find that perfect headboard... 


Sunday, February 10, 2013

A Quick Guide to Mural Envy

Painting a mural is a process but it doesn't have to be hard. I finally settled on the theme for our nursery and got started right away on the mural. Please note that finding a theme is a completely different story and I'll write about it next month. For now, let's focus on the title of the blog.

After you decide what you want to paint I strongly recommend investing in a projector. Projectors have been used for over a century by artists like Norman Rockwell and Maxfield Parrish (two of my personal heroes). Projectors help you get the image on the wall in the size you need. I've used a projector for many, many, a mural.

First, you need a high contrast image to work with. In this case I drew my plan on paper and passed along to another artist friend - Michelle Lana, to digitize the work and clean it up. She produced a .jpg which I projected on the wall. Thank you Michelle - you're the best. :)


After you project the plan in a very light pencil you'll want to set up the area in the room you plan to work in. You need plenty of lighting, floor covering, and supplies. I also recommend a trusty side-kick and/or apprentice to keep you company during the process.


Tips:
  • If you're custom mixing colors, mix more than you need. You'll never be able to create the exact color if you need more, and you will always need more.
  • Use synthetic brushes. Period. They're the softest and spread the paint the best. This reduces your work time and saves money because you won't have to repaint as many layers.
  • Try to avoid leaving brush strokes and thin out your paint. Paint strokes are hard to remove when you decide to repaint the room. Trust me...
When you're ready to paint work in color blocks. Work on one section at a time using the same color so you don't have to remix it again. I prefer to dilute my paints with a thinner or water to make the paint more pliable and smoother.  I usually have a hair dryer handy for quick drying between layers.


  Layer by layer you'll start adding the details. It takes time. Reminder: if you're painting with several colors you NEED to let it dry before going back in with another color. This is especially true if you're using tape on your edges.


Finishing detals are the most fun! Once you let the walls dry the best part is putting everything together!


The same rules apply for more complicated murals. But if you follow the guidelines above you should be on your way to mural envy. Good luck!