Sunday, August 21, 2011

Easy weekend project!


Our nightstands were a little big for the space in the Master bedroom and all the dark furniture was swallowing up the room and making it stuffy. I bought these TV dinner trays for a few bucks at a yard sale before I went off to college. Over the years they've served as plant stands, accent tables, studio furniture and the occasional TV dinner tray once or twice! So....naturally when I was trying to resolve the space issue I immediately thought of these dutiful tables and how we could use them once more.

With some light sanding, acrylic paint and shellac, you can have an entirely new piece of furniture in a couple of days!


 The best $5.00 I ever spent...

Monday, May 30, 2011

Put some extra butter on your bread...

Two nights ago I was cleaning my brushes in the kitchen sink and the color that washed off was this concoction of blues and greens that caught my eye. I saved the jar of turpentine and took it to home depot the next day. 36 hours later, we have a completely new kitchen and it totally works with the dining room.

Before

After

Saturday, May 14, 2011

Making Changes - again

We've been living here for about 7 months and are STILL figuring out where to put stuff and what works best with the flow. This month we played "musical furniture" (thanks to our friends who helped) and shifted 4 rooms full of furniture over by one. It turns out this was actually a great idea. Now our dining room is brilliantly located in the kitchen and is used on a regular basis. No more eating dinner in the family room - sorry.

I was able to repurpose a lot of what we already had for decorating purposes. We moved in the trunk that I scored last year for some casual seating and hung the bicycle sculpture on top of it. This anchors the wall opposite the curtains so the dark colors have a nice balance. It also helped introduce the black countertops in the kitchen area.

The almighty red mirror was also moved into the new dining room. I already had the green furniture so the curtains I picked out played off those two colors - red and green. It was a gamble to bring in reds and greens without making our place look like Christmas but it worked out. I used red as the main color in this room which I think is great for a dining room.

The carpet was purchased online at Homedecorators.com. It's not expensive and I didnt want to spend a lot on a carpet that would go under the table for obvious reasons. The carpet was also a necessity to help with noise level in the room.

We hung tea light lanterns over the counter top for a little flair. We got those and the curtains at World Market. You'll notice the curtains are hung on the wall without windows. This is a great way to focus on a piece of furniture in any room. You really don't need windows to have curtains.


Here's how it all worked together.... 

Tuesday, April 5, 2011

Make a statement...

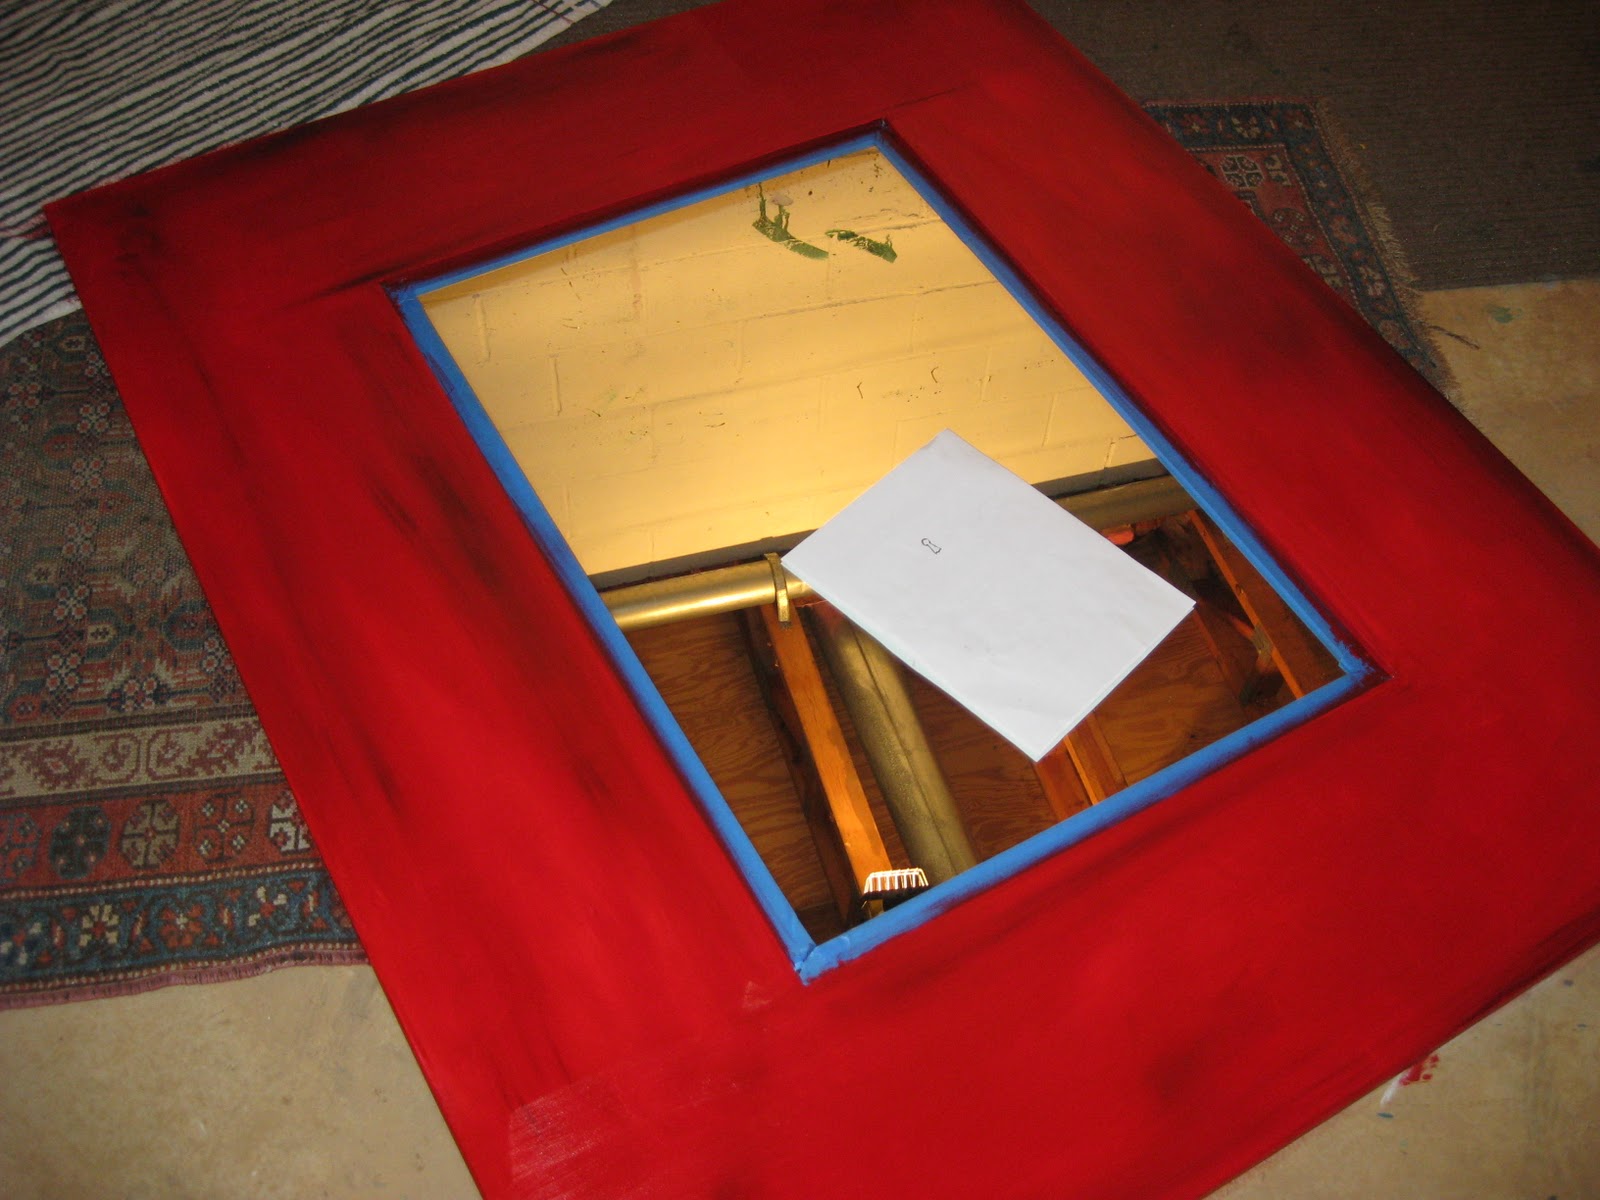
Red mirrors are pretty hot right now. Actually, anything you can paint yourself to save some money is pretty hot right now. At least to me. Remember that Craigslist mirror I scored in December....?


  Well, 3 months later, here it is! 


This was a great project to work on over the winter. I opted to use Oil paint instead of acrylic so I could get some glazing effects. It did take about 2 months to dry and the edges are actually still wet. I just couldnt wait to hang it anymore...

You can paint anything so long as you have 3 things; Gesso (primer), a paintbrush and paint.

Here's what I did. 

Step 1: Tape the edges on the mirror and with primer. I used Liqutex Gesso. It's the cheapest and in my opinion you don't need to spend a lot on a material that's going underneath paint.


 Step 2: Have zero patience and use an old hair dryer to help the gesso dry faster.


Step 3: Paint away! I used Daler Rowney Artists Oil paints (not so cheap) and layered with linseed oil, and Turpinoid mineral spirits to get that splattered look.

Colors Selected varied throughout;
Cadmium deep red, Carmine, Indian Red, Cobalt Violet Hue and Sepia.

Friday, April 1, 2011

Staged to Sell!!!

I have a lot of paintings. Lots! Some have permanent homes and others are placed in foster care until they are scooped up by an excited buyer. In this case it was a little different. I was recently contacted to help make some empty walls in a house (up for sale) a little more inviting to potential buyers. 

In 5 seconds I turned over several pieces that were collecting dust in the studio. A very talented staging company did the rest. Check these OUT! Maybe Pottery Barn or Arhaus will call me for some work next....and Yes I would become a sell out artist in a heart beat. Don't judge me for that.

Thanks for the opportunity Pam Dargue aka Best Real Estate Agent. Ever. It's already planted a few very good ideas in my head for future endeavors. Now I just need about 6 more hours a day to do it.


Saturday, March 19, 2011

Colors of the Spring are amongst us....

I think I'm wishing the summer to get here faster, so much so that the colors are manifesting into my work. This 3 piece 5' painting is now hanging in our bedroom. A welcome piece of energy on the huge empty walls.

Turquoise, Phalo Greens and Crimson hues all blended together with the saddle tone of our room. This is the first thing I'll see when I wake up every morning... then the coffee pot. 

This new work is so versatile, it can go anywhere and in any room. I'm finding myself drawn to having options with the work once it's done. I suppose that creates more of a challenge for me in the long run. But clearly it's worth it!


Sunday, February 6, 2011

First in-home art installation of the year!

Hanging my artwork can get a bit dangerous. Which is why my husband does it for me.
This is a 3 piece tryptic which I completed over the holidays when I took a few days off. It's actually still wet but I couldn't wait any longer to get it on the walls...that is, once I decided where to put it! Thanks honey!